Do you find it difficult to design a Christmas menu that captures the spirit of the holidays with its eye-catching style?
Look no further! We realize how important it is to create a delicious menu that sets the tone for your Christmas event. Use PhotoADKing’s Christmas menu template to create an eye-catching menu.
In this guide, we’ll take you step-by-step through how to design a Christmas menu with PhotoADKing. Everything from choosing a template to adding images to customizing fonts will be covered. By the end of this guide, you’ll have a beautiful and attractive Christmas card that will impress your guests.
Table of Content
How to Design a Christmas Menu in 5 Easy Steps?
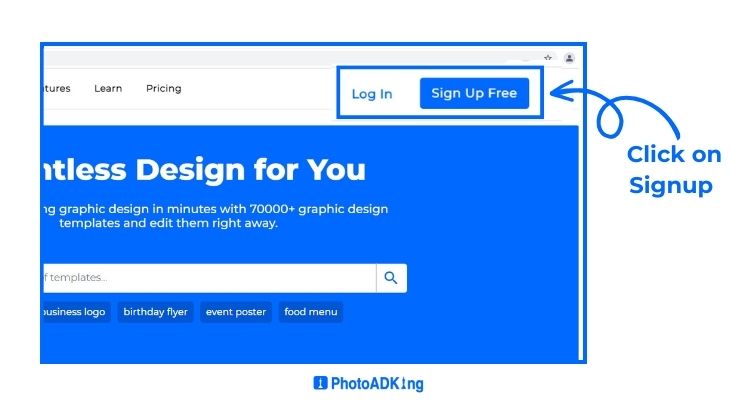
Step 1: Login or Sign Up to PhotoADKing
You must sign in or register with PhotoADKing before you can begin creating your Christmas menu. If you’re a new user, simply click the “Sign Up” button and fill in your details. Once logged in, you can access the full range of templates and tools available on the site.
Sign up with PhotoADKing
Step 2: Search for “Christmas Menu“
Once you’re logged in, you can start designing your Christmas menu. The first step is to find a Christmas menu template that suits your style and needs. To do this, type “Christmas menu” in the search bar and press enter. You’ll get a number of different templates to choose from, each with its own unique design and layout.

Step 3: Select Christmas Menu Template According to Your Choice
It’s time to choose the ideal Christmas menu template you found. To open the template in the PhotoADKing editor, click on the one that grabs your attention. After that, you can begin modifying the template to make it unique to you.

Step 4: Customize Your Christmas Menu
Once you’ve decided on a template, you can begin tailoring it to your specific requirements. This is where you can express yourself and personalize the design. You might want to think about the following:
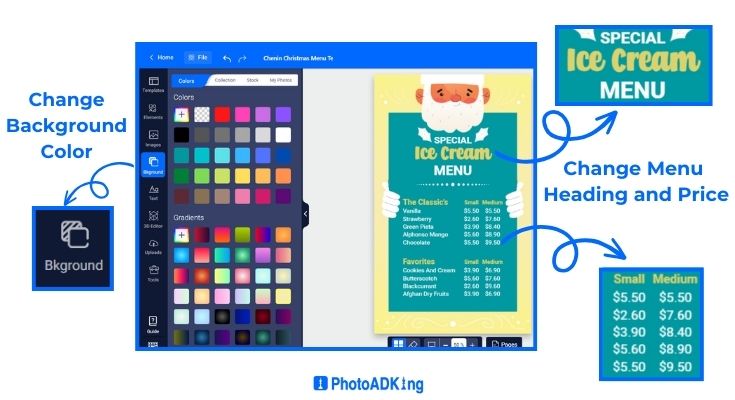
- Add Your Heading And Set Your Price
- Change Background
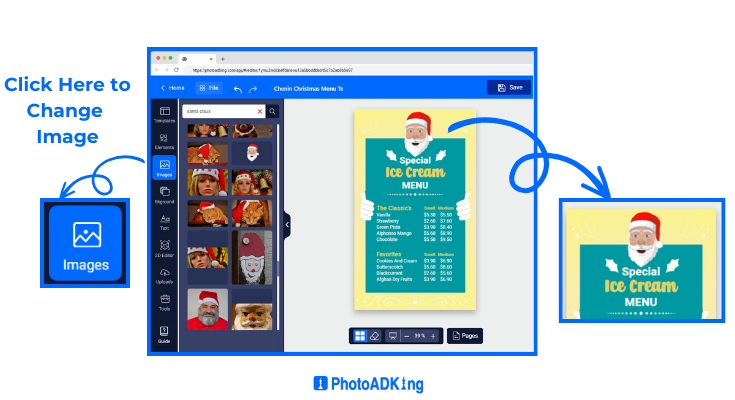
- Replace Your Image
Add Your Heading, Set Your Price, and Change Background
Replace Your Image
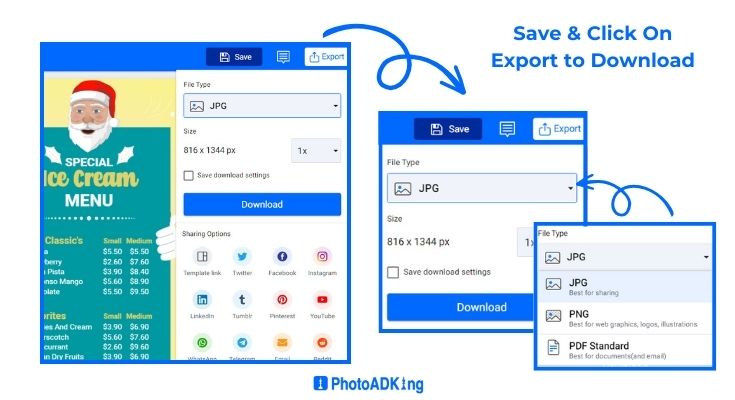
Step 5: Save and Download Your Christmas Menu
Once you’re happy with your design, it’s time to save and download your Christmas menu. Click on the “Save” button in the top right corner of the screen to save your design. From there, you can choose to download your menu as a PNG, PDF, or JPG file. And voila! You’ve just designed your very own Christmas menu with PhotoADKing.
We hope you find the above guide helpful. Also, make sure before you start designing your Christmas menu, to consider a restaurant menu template to streamline the process and create a visually appealing and organized menu that will delight your customers.
Additionally, if you’re looking for more information about the blog, feel free to check out the links below.
Read More Related Blogs
Christmas Menu Design Ideas and Examples
Thanksgiving Menu Design Ideas
Christmas Marketing Ideas
10+ Christmas Coupon Ideas and Examples 2023
Christmas Logo Ideas
Amazing Christmas Cards Design Ideas
Creative Christmas Gift Card Ideas
4th of July Menu Design Ideas
Labor Day Flyer Ideas
Mother’s Day Menu Design Ideas
Father’s Day Menu Design Ideas
Halloween Menu Design Ideas
How To Design a Dinner Menu
Menu Style Ideas
Christmas Gift Voucher Ideas
15+ Christmas Greeting Card Ideas
How to Make Christmas Cards in 5 Easy Steps
Conclusion
Designing a Christmas menu doesn’t have to be a daunting task, especially with the help of PhotoADKing. By following the simple steps on how to design a Christmas menu outlined in this article, you can create a beautiful and personalized Christmas menu that will impress your guests and customers.


