Don’t judge a book by its cover, they say. Well, it’s the cover that’s the first thing visible & attracts viewers. Don’t you agree? Here’s the step-by-step guide on how to make a YouTube thumbnail.
The concept of YouTube Thumbnails is much similar. It’s the little cover we use for our YouTube videos & it is only judged by viewers whether or not to click. The logic is simple. If your YouTube thumbnail templates aren’t impressive enough, they’ll scroll. But nothing to worry about, you can easily create your YouTube thumbnail templates with a free YouTube thumbnail maker!
Customized thumbnails reflect strong & vibrant images conveying the key information about the videos within. Be it large or small, they are least expected to be expressive & winning.
Hold tight, you’re about to learn how to make a thumbnail for YouTube with us here. Meanwhile, you may check out the YouTube Thumbnail Size Guide: Ideal Dimensions, Best Practices & More.
Quick Tips For YouTube Thumbnails
- Plan your YouTube Thumbnails while preparing your video. You’ll get enough time to create various splendid options to use as thumbnails.
- Make sure your YouTube Thumbnail is no more than a size of 2MB, even if it is a high-resolution one.
- Both the large & small sizes of your thumbnails should look equally amazing. The hack is to perform zoom-in & out tests while in making.
- Never publish your thumbnail without comparing yours with the rest of the thumbnails already existing. Yours MUST stand out.
- Maintaining uniformity is a must for your YouTube channel. So, don’t publish different-looking thumbnails for each of your videos.
How To Create A Thumbnail For YouTube?
Here’s how to create a YouTube thumbnail in 7 easy steps with PhotoADKing. Our YouTube thumbnail creator is the handy graphic designing tool you’ll wish to have discovered earlier.
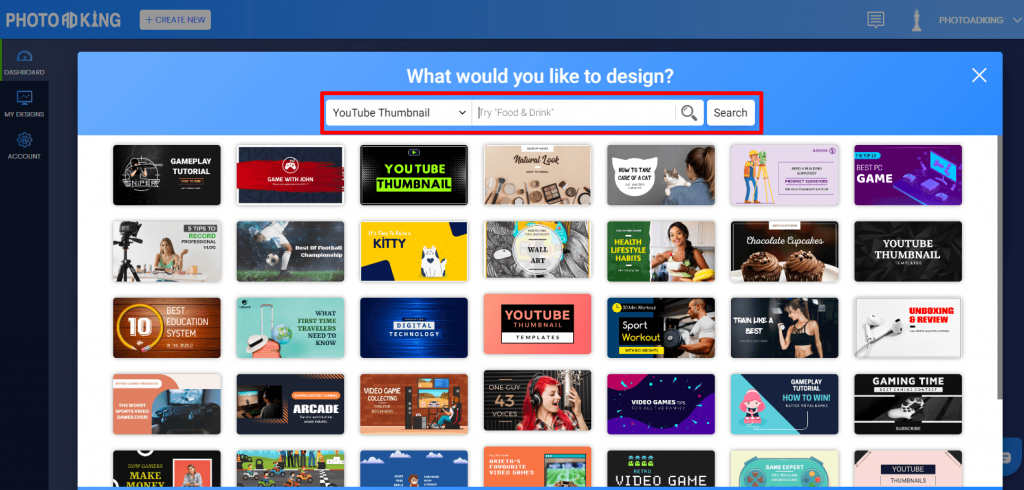
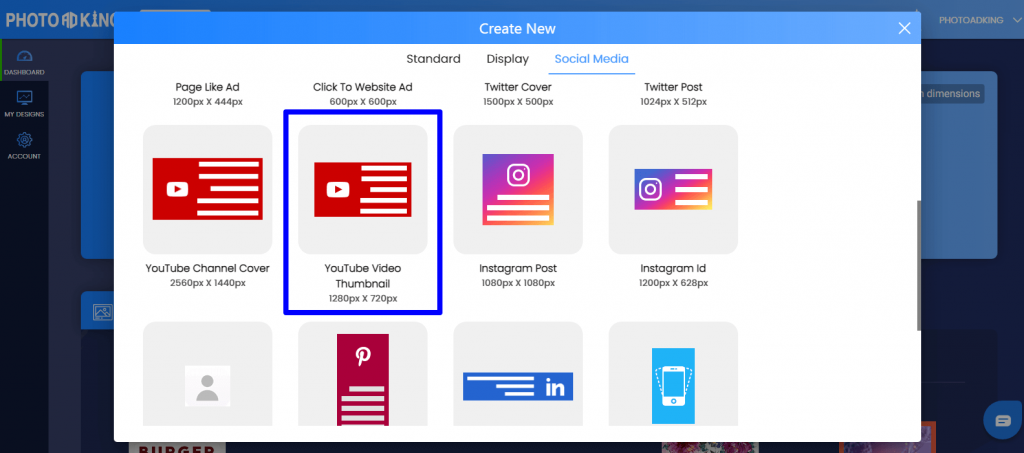
Step: 1 – Create Your YouTube Thumbnail From Scratch Or Use Premade Templates
PhotoADKing has dozens of readymade YouTube Thumbnail Templates to get inspired from. If you’re comfortable with DIY design, you may create it from scratch too.
Step: 2 – Pick The Focus Image Of Your YouTube Thumbnail
Always use a focus thumbnail image that describes your video at its best.
For instance, your video is about ‘10 places to visit in India under 30000’, you should be clear with how to stir the interest of your target audience. Please refer to similar video thumbnails to understand the dos & don’ts better.
Once you get inspiration, pick your focus image that’ll be the key area of your thumbnail. You may either upload your photo to PhotoADKing or choose from our free stock image library too. Before you remove the background, try to make sure that your subject is clear. Using ObjectRemover AI to delete unwanted things from the stuff you want to stay.
Step: 3 – Remove the Background Of Your Focus Image
Remember the rule of thumb – ‘Backgrounds are distracting.’
Don’t forget to remove the background of your focus image & here’s how you can do it with PhotoADKing.
Simply put, you have to select the portion of your image you want to keep & remove the rest part. That’s all.
Step: 4 – Add Sticker Effect To Your Thumbnail
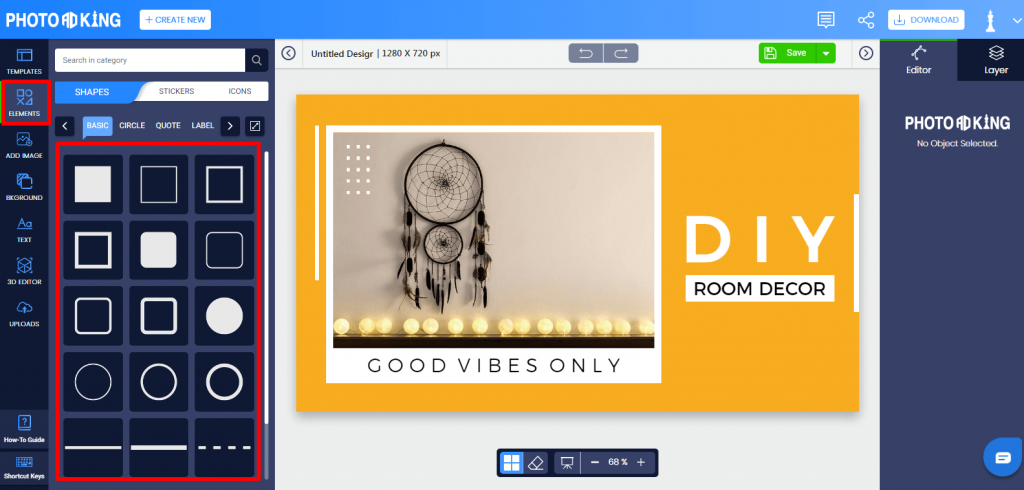
The image area that pops up grabs attention first. So, don’t forget to add a sticker effect with a thick border around your subject. This outline effect will make your video thumbnail stand out for sure. Here’s how to do it with PhotoADKing’s powerful editor.
Step: 5 – Give An Expert Touch To The Backdrop
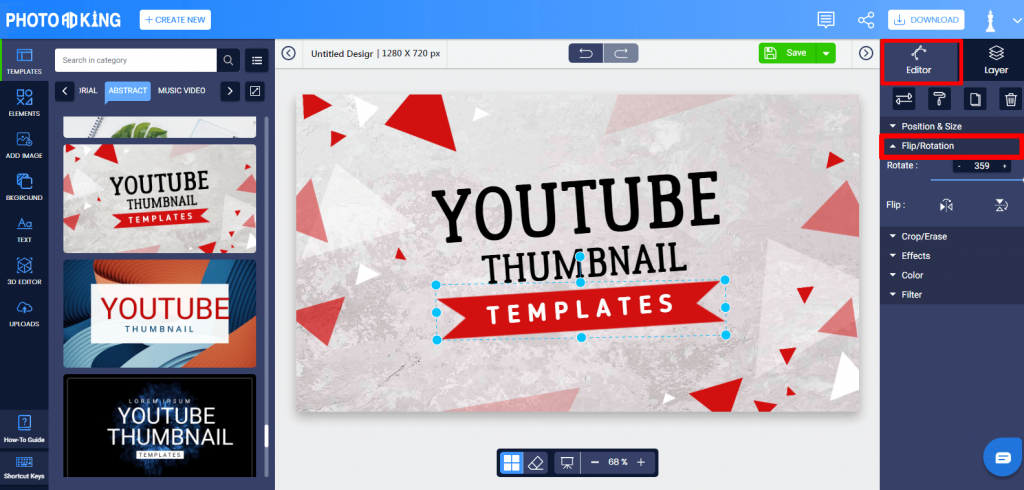
Your background is removed now & you have a spectacularly outlined subject image with you. What next? You won’t just put up your image just like that. Rotate, tilt, or flip it to draw attention. A little spice makes everything nice.
Do what you think will give a unique touch to your subject. Add a cool backdrop that enhances your thumbnail.
Step: 6 – Add Bold & Beautiful Text To Your Thumbnail
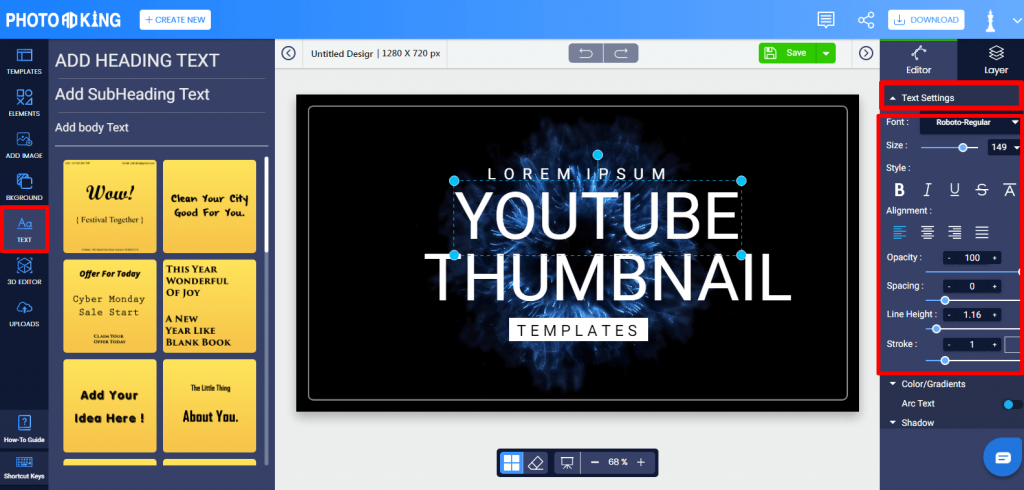
Using typography on YouTube Thumbnails is quite challenging. You have to keep visibility in mind. Your thumbnail appears small on smartphone screens while a bit enlarged on desktop screens. Test the visibility with bold & beautiful thumbnail text. It should be properly readable regardless of whether viewers using a smartphone or desktop.
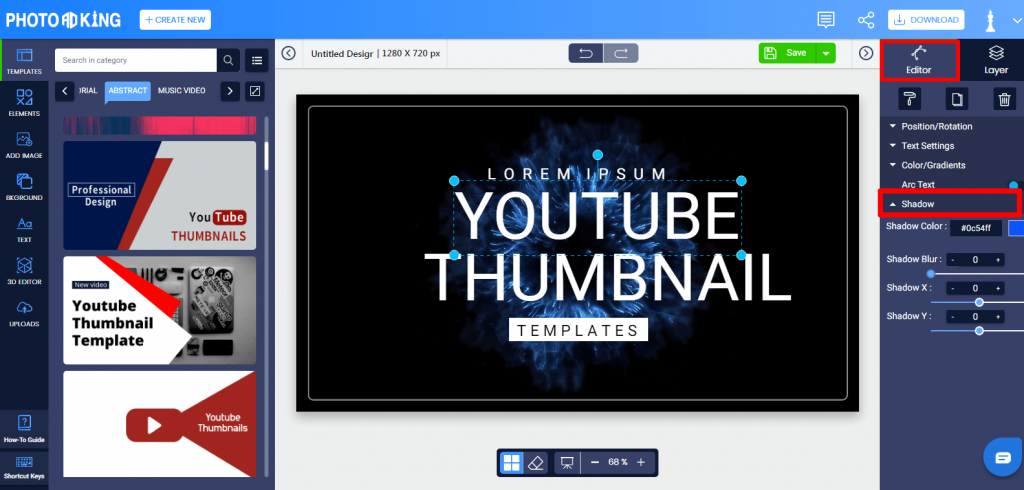
Just like we suggest adding an outline to your subject, you can also add a shadow effect to the key text. It makes a great visual appeal.
It takes no time to do it with PhotoADKing.
Step: 7 – Preview & Download Your YouTube Thumbnail Template
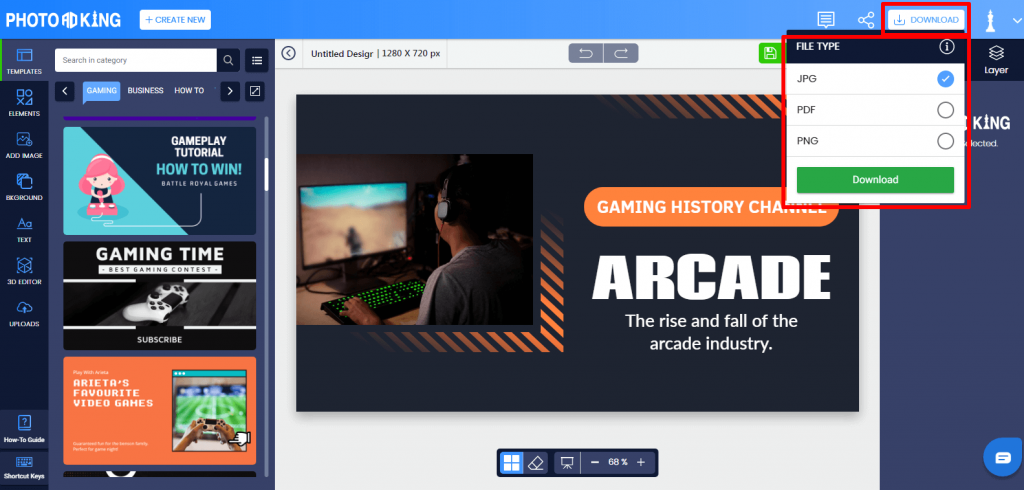
Once you have performed the necessary editing, it’s important to preview your YouTube Thumbnail template. Before you save or share your copy instantly, check out for typos mistakes, or spelling errors. Get an authoritative person’s opinion on your thumbnail. Also, look up to your make from an end-user’s perspective. Is it worth deserving a click? Make changes until your answer is ‘YES.’ Additionally, use an image compressor to ensure your final thumbnail remains under the 2MB limit while retaining high quality. This will help your thumbnail load quickly across devices without sacrificing visual clarity.
Finally, you can download your high-quality YouTube Thumbnail File or share it with one click from the editor itself.
That’s all you need to do!
Conclusion
It may not feel like a 5-minute task for beginners. But, as you get used to PhotoADKing, you can surely do it within 5 minutes. You’ll be glad to know that your YouTube Thumbnail Template Design can be saved as a draft with PhotoADKing. This means that when you’re here to create a similar thumbnail, a lot of effort is reduced.
Explore DIY YouTube Channel Art Templates & YouTube Banner Examples too.
All we want for you is to make awesome YouTube Thumbnails with us. So, why don’t you give it a try now?!


