Don’t know how to Design a food menu. It can be a challenging task as it requires careful planning and consideration.
One of the main problems that people face when preparing a menu is limited knowledge of cuisine and food trends. This can make it difficult to develop a menu that appeals to customers. Using food menu templates can be helpful in this case, as it provides a guide on how to properly balance the flavors, textures, and colors of menu items to create a visually appealing and well-rounded dining experience.
Other common issues people come up against when creating a menu include overcrowding, pricing, keeping the menu updated, and designing and presenting the food. In this guide, we will help you understand how to design a menu that will delight your customers and set your business apart.
Creating a food menu can be an exciting process, but it also requires careful planning and consideration. A well-crafted menu, designed with the help of an online graphics editor, can help attract customers, increase sales, and establish your restaurant’s brand. In this guide, we will walk you through the steps of how to make a food menu using an online graphics editor.
Table of content
1. Make a list of all menu items
2. Organise menu items by category
3. Set all menu items by pricing
4. Make a description of the items
5. Select images, colors, and fonts for your menu
6. Select the final layout of your composition
7. Read Carefully Before Downloading and Printing Your Menu
1. Make a List of All Menu Items
First, you think about the menu. What foods or dishes are you planning to serve in your restaurant?
Before you decide to offer food in your restaurant you should consider where you want to build your restaurant. Because you should choose food according to what people want to eat. Make a list of all the meals you wish to serve using Excel, a Google Sheet, or even just pen and paper.
Here are some popular menu items for a restaurant in the USA that you should consider while creating your restaurant menu.
- Appetizers
- Burgers
- Fries
- Sandwiches
- Pizza
- Salads
- Tacos
- Pasta
- Steak
- Seafood
- Dessert
It is also pertinent to note that menu items can vary depending on the region and season.
2. Organise menu items by category
To organize menu items by category, you could create different sections or section headers on your menu, and then list the items within each category under the appropriate heading.
For example, you could have a “Starters” section, an “Entrees” section, and a “Desserts” section, and list the corresponding menu items under each of those headings.
Categorizing menu items is an essential step in organizing a restaurant’s menu and making it easy for customers to find what they’re looking for. One way to organize menu items is by classifying them based on their main ingredients or cooking method.
For example, all of the burgers can be grouped under the “Burgers” category, while all of the fries can be grouped under the “Fries” category.
Another way to categorize menu items is by grouping them based on their level of formality or price point.
For example, all of the upscale or premium items, such as fillet mignon, can be grouped under the “Upscale Entrees” category, while all of the casual or lower-priced items such as sandwiches can be classified under the “Casual Entrees” category.
Additionally, menu items can also be grouped by dietary restrictions such as vegetarian, vegan, etc. Categorizing menu items in this way makes it easy for customers to quickly find what they’re looking for. It can also help increase sales by drawing attention to popular or high-margin items. Just as a grocery list template helps organize shopping lists by type, such as produce, dairy, or snacks, a well-structured menu layout brings clarity and ease to the dining experience.
The following is a list of food items that we have categorized. That we decided first.
- Appetizers:
– Mozzarella sticks
– Chicken wings
– Nachos
- Burgers:
– Beef
– Turkey
– Veggie
- Fries:
– Regular
– Sweet potato
– Truffle
- Sandwiches:
– BLT
– Grilled cheese
– Chicken Club
- Pizza:
– Margherita
– Pepperoni
– BBQ chicken
- Salads:
– Caesar
– Greek
– Mixed greens
- Tacos:
– Chicken
– Beef
– Fish
- Pasta:
– Spaghetti and meatballs
– Fettuccine alfredo
– Pesto
- Steak:
– Ribeye
– Sirloin
– Fillet Mignon
- Seafood:
– Grilled salmon
– Shrimp scampi
– Fish and chips
- Dessert:
– Cookies
– Biscuits
– Pastries
3. Set All Menu Items by Pricing
When setting menu prices, it is imperative to take into consideration the cost of ingredients, labor, and overhead when determining prices for each menu item. Additionally, it is critical to consider the target market and what they are willing to pay for a certain dish. One strategy is to set a markup on food costs, which is the percentage added to the cost of ingredients to cover expenses and create a profit.
Another strategy is to use a pricing model that takes into account the popularity and perceived value of a dish. Ultimately, it is paramount to find a balance between profitability and affordability to attract and retain customers.
4. Make a description of the food items
When describing food items, it’s essential to focus on key details such as the ingredients, preparation method, and any notable flavors or textures. To start, provide an overview of the dish and its main components.
For example, “This is a classic lasagna dish with layers of pasta, rich meat sauce, and gooey mozzarella cheese.” Then, mention any special preparation methods or unique ingredients that help the dish stand out.
For example, “The pasta is made fresh in-house and the meat sauce is simmered for hours to bring out the deep, rich flavor.” It’s also helpful to describe the texture and any prominent flavors in the dish.
Overall, providing a detailed description of the food items can help to make them more appealing to potential customers.
5. Select Images, Colours, and Fonts for Your Menu
Selecting the right images, colors, and fonts for your menu is crucial to creating a visually appealing and easy-to-read food menu.
When choosing images, consider using high-quality, professional photos of your dishes to entice customers and give them a sense of what to expect. Be sure to use images that are aligned with your brand and style.
Colors are also helpful for creating a cohesive look and feel for your menu. Choose colors that complement your brand and the overall atmosphere of your establishment.
For example, if your restaurant has a modern, minimalist aesthetic, consider using a monochromatic color scheme. If your restaurant has a rustic or earthy feel, consider using warm, earthy tones.
Regarding fonts, readability and legibility should be the top priority. Select a font that is easy to read and that contrasts well with the background color of your menu. Avoid using overly decorative fonts that can be difficult to read. A general rule of thumb is to use one or two different font styles, one for headlines and one for body text. This will keep it simple and easy to understand.
Overall, the right combination of images, colors, and fonts will enhance the appeal of your menu and make it more inviting for customers.
6. Select a Final Layout of Your Composition
Selecting a final layout for your composition is an extremely crucial step in the design process. It involves arranging the various elements of your composition, such as text, images, and graphics, in a way that is visually pleasing and easy to understand. A well-designed layout can guide the viewer’s eye through the composition, highlighting the most relevant information.
When selecting a final layout, consider the use of whitespace, balance, and hierarchy when arranging your composition’s elements. As well as the purpose of your composition and the intended audience.
For example, if you are designing a menu, the layout should be easy to navigate and allow customers to quickly find the dishes they are looking for.
Finally, take time to review and refine your layout. Look for areas that can be improved and make adjustments as necessary. Show the design to other people and get their feedback.
7. Read Carefully Before Downloading and Printing Your Menu
It’s finally time to download and print the menu for your restaurant business. However, before you do that, read your menu for a while and send it to someone who hasn’t looked at it for a week. A single missing comma or other error might impact how your customers view your restaurant.
How to make a food menu design with PhotoADKing?
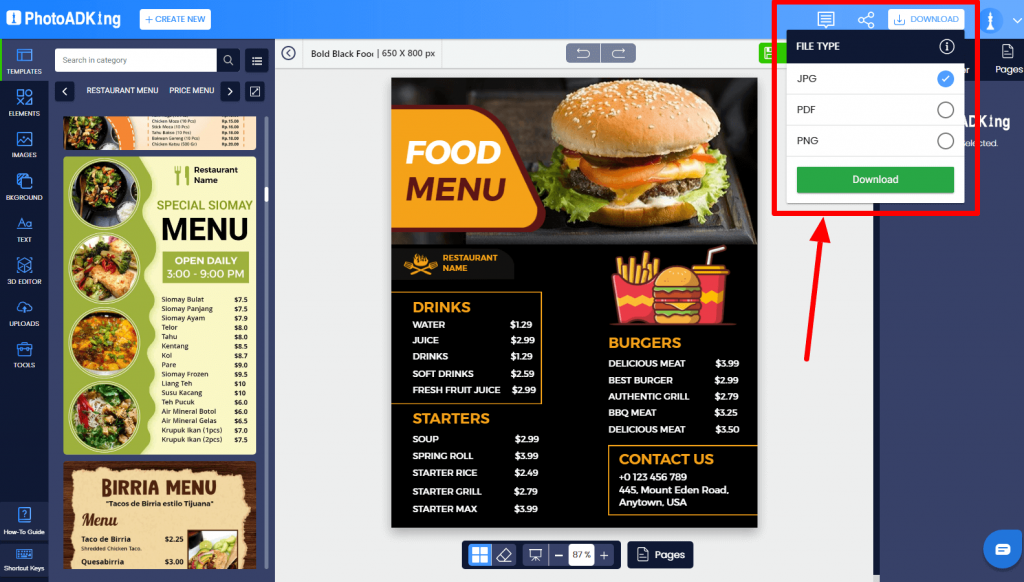
You can create a food menu quickly and easily with ready-made food menu templates. which has been provided by PhotoADKing. Just you need to follow only 5 steps that you will understand easily and make a food menu in a moment
1. Go to the PhotoADKing website and sign up for an account.
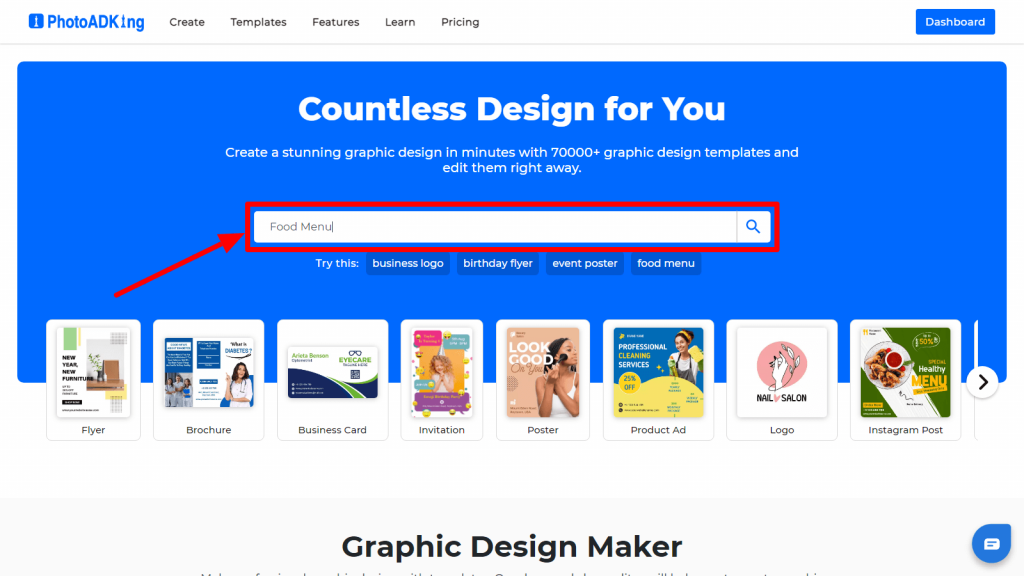
2. Once you are logged in, type ‘Food Menu’ in the search bar.
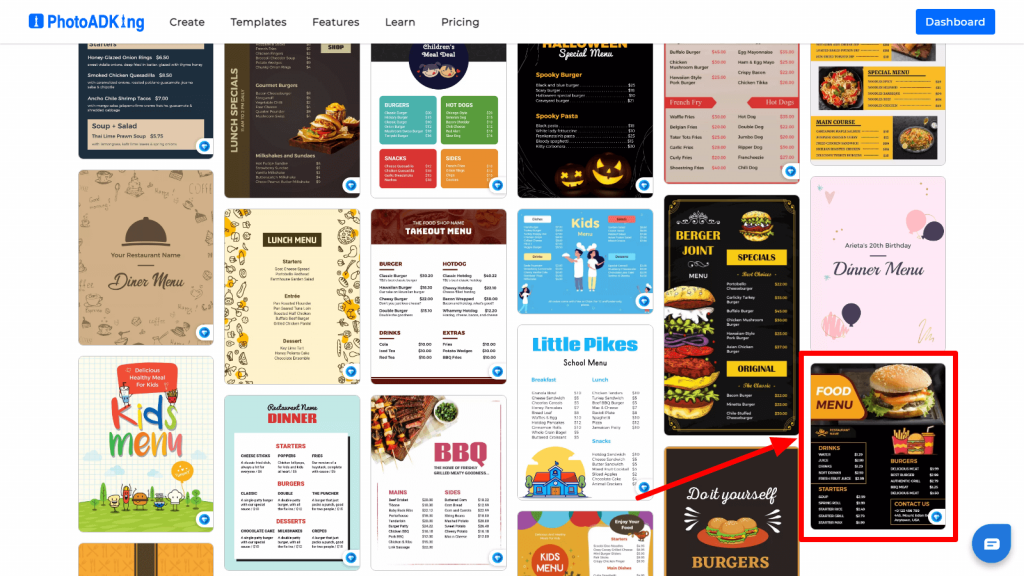
3. Choose the one that perfectly suits your needs.
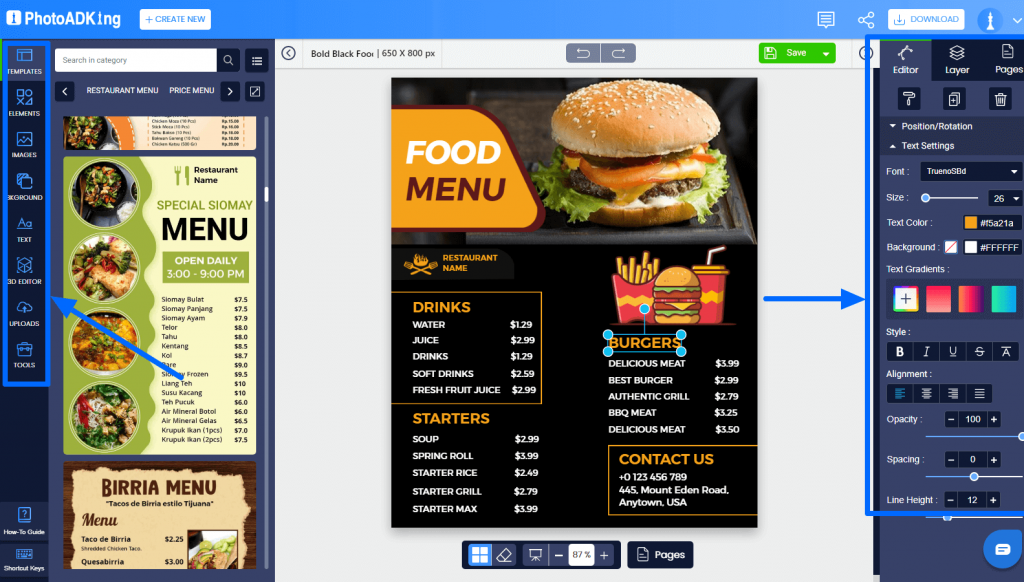
4. Customize the template by adding your own text, images, and colors.
5. After editing your certificate, you can download and print it.
Check out these amazing food poster ideas for your restaurant.
Bottom line
To create a well-planned and organized list of food and beverage options that will appeal to your target audience, and to present them in a visually appealing way that showcases the unique qualities of your establishment. It should be planned in a way that covers all the major food groups and dietary restrictions, and it should also be cost-effective, profitable, and easy to execute.
When it comes to representing the menu for an event or restaurant, there are many different menu styles to consider. Each of these menu style ideas has its own unique charm and can be tailored to suit the event or restaurant.
Additionally, it’s important to keep your menu updated seasonally and to consider the latest trends and customer preferences.


